(Finished the document) Tag: Visual edit |
(Formatting fixes) Tag: Visual edit |
||
| Line 4: | Line 4: | ||
* [https://www.nexusmods.com/metalgearsolidvtpp/mods/571 Side Op Companion] (Also install the Infinite Heaven Quick Menu preset that comes with this) |
* [https://www.nexusmods.com/metalgearsolidvtpp/mods/571 Side Op Companion] (Also install the Infinite Heaven Quick Menu preset that comes with this) |
||
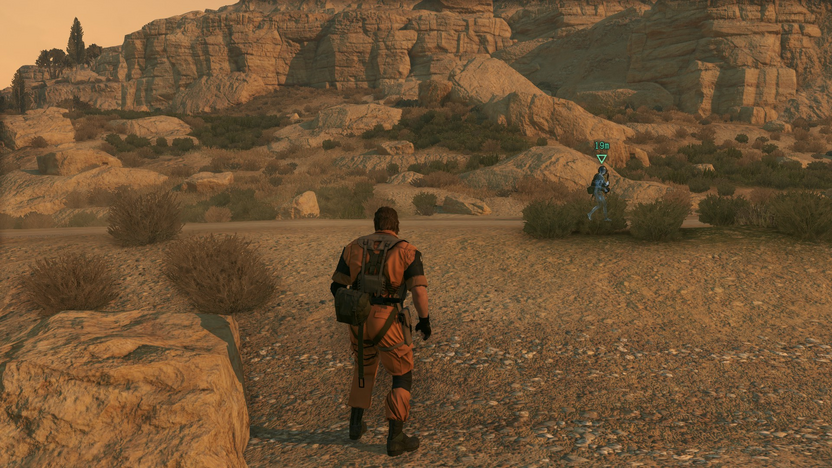
The first thing you want to do is launch the game and head to the location that you want to make a side op in. Once you are there hold down the call button and press Up on the keyboard to set all of the enemy soldiers to friendly. Next you will travel to the nearest outpost or area with enemy troops. Place a marker on one of them and hold the call button again. This time press Down and the screen will print the soldier's name, and the nearest CP. Take note of the CP name. |
The first thing you want to do is launch the game and head to the location that you want to make a side op in. Once you are there hold down the call button and press Up on the keyboard to set all of the enemy soldiers to friendly. Next you will travel to the nearest outpost or area with enemy troops. Place a marker on one of them and hold the call button again. This time press Down and the screen will print the soldier's name, and the nearest CP. Take note of the CP name. |
||
| − | [[File:20200423202203 1.jpg|thumb|839x839px]] |
+ | [[File:20200423202203 1.jpg|thumb|839x839px|none]] |
Once you have that information you can proceed to where you would like to place your route. Navigate to the exact point you would like your route to begin and face the direction you would like the soldier to be facing at the beginning of the route. Hold down the Call key and press the Crouch key. This will print the coordinates of you location and orientation to ih_log.txt. That file is located in a folder named "mod" that can be found in the main MGS_TPP folder. Repeat this step for the second point of your route. You can now exit MGSV. |
Once you have that information you can proceed to where you would like to place your route. Navigate to the exact point you would like your route to begin and face the direction you would like the soldier to be facing at the beginning of the route. Hold down the Call key and press the Crouch key. This will print the coordinates of you location and orientation to ih_log.txt. That file is located in a folder named "mod" that can be found in the main MGS_TPP folder. Repeat this step for the second point of your route. You can now exit MGSV. |
||
Open up ih_log.txt in your text editor of choice. Scroll to the bottom to find some important pieces of information. The first is a line that contains the quest area you were in when you took your coordinates. Next to that it will say if it is an acceptable location to place a side op. Below that information are the coordinates that you took. |
Open up ih_log.txt in your text editor of choice. Scroll to the bottom to find some important pieces of information. The first is a line that contains the quest area you were in when you took your coordinates. Next to that it will say if it is an acceptable location to place a side op. Below that information are the coordinates that you took. |
||
| − | [[File:Notepad.png|thumb|834x834px]] |
+ | [[File:Notepad.png|thumb|834x834px|none]] |
Keep this information open, as you will need it for the remaining steps. Open up Foxkit in Unity, this may take a moment the first time you open it. Right click in the hierarchy area. In the menu that appears select Foxkit -> Route Set. |
Keep this information open, as you will need it for the remaining steps. Open up Foxkit in Unity, this may take a moment the first time you open it. Right click in the hierarchy area. In the menu that appears select Foxkit -> Route Set. |
||
| − | [[File:Unity1.png|thumb|551x551px]] |
+ | [[File:Unity1.png|thumb|551x551px|none]] |
This will create a new game object, as well as open an area where you can begin to edit your new route. Click the button to create a new route within your route set. This will create a child object that contains the route, and the first node for the route nested within it. |
This will create a new game object, as well as open an area where you can begin to edit your new route. Click the button to create a new route within your route set. This will create a child object that contains the route, and the first node for the route nested within it. |
||
| − | [[File:Unity2.png|thumb|612x612px]] |
+ | [[File:Unity2.png|thumb|612x612px|none]] |
Click on the first node. With the first node open you are able to edit the coordinates of it under the Local Transform option. Paste in the first set of coordinates that you took here. IMPORTANT - The X coordinate should always have the opposite positive or negative value as the coordinate that you took. So if your taken X coordinate is 100, then you would enter -100 in Unity. If your taken coordinate is -100, then you would enter 100 in Unity. |
Click on the first node. With the first node open you are able to edit the coordinates of it under the Local Transform option. Paste in the first set of coordinates that you took here. IMPORTANT - The X coordinate should always have the opposite positive or negative value as the coordinate that you took. So if your taken X coordinate is 100, then you would enter -100 in Unity. If your taken coordinate is -100, then you would enter 100 in Unity. |
||
| − | [[File:Unity3.png|thumb|572x572px]] |
+ | [[File:Unity3.png|thumb|572x572px|none]] |
Once the first value is set, click on the button to create a new node. |
Once the first value is set, click on the button to create a new node. |
||
| − | [[File:Unity4.png|thumb|569x569px]] |
+ | [[File:Unity4.png|thumb|569x569px|none]] |
With the new node created and selected, enter the values for the second set of coordinates that you took. Remember to flip the positive or negative on the X coordinate. |
With the new node created and selected, enter the values for the second set of coordinates that you took. Remember to flip the positive or negative on the X coordinate. |
||
| − | [[File:Unity5.png|thumb|567x567px]] |
+ | [[File:Unity5.png|thumb|567x567px|none]] |
Once both coordinates are placed, click on the Parent Route set object in the Hierarchy, and then click on the button to save your route to a .frt file. Save it to the Route Assets folder in the SOC Assets folder that gets installed with SOC. |
Once both coordinates are placed, click on the Parent Route set object in the Hierarchy, and then click on the button to save your route to a .frt file. Save it to the Route Assets folder in the SOC Assets folder that gets installed with SOC. |
||
| − | [[File:Unity7.png|thumb|610x610px]] |
+ | [[File:Unity7.png|thumb|610x610px|none]] |
Open up SOC to create a new sideop. Enter in a file name for it, an unique Quest Number for it, set the location to the map the route is meant for, place coordinates for the general area that the route is in and then choose the correct Quest Area (found in ih_log.txt), the correct Quest CP (this was found from the tagged soldier in game) and then select your route file. Fill Radius, Quest Category, and Rank to whatever you wish. |
Open up SOC to create a new sideop. Enter in a file name for it, an unique Quest Number for it, set the location to the map the route is meant for, place coordinates for the general area that the route is in and then choose the correct Quest Area (found in ih_log.txt), the correct Quest CP (this was found from the tagged soldier in game) and then select your route file. Fill Radius, Quest Category, and Rank to whatever you wish. |
||
| − | [[File:SOC1.png|thumb|540x540px]] |
+ | [[File:SOC1.png|thumb|540x540px|none]] |
Fill out the Flavor text fields and then press the button to proceed to the next part of SOC. |
Fill out the Flavor text fields and then press the button to proceed to the next part of SOC. |
||
| − | [[File:SOC2.png|thumb|804x804px]] |
+ | [[File:SOC2.png|thumb|804x804px|none]] |
Spawn a sol_quest enemy, assign him to your custom route and then press the button to build your side op. |
Spawn a sol_quest enemy, assign him to your custom route and then press the button to build your side op. |
||
| − | [[File:SOC3.png|thumb|372x372px]] |
+ | [[File:SOC3.png|thumb|372x372px|none]] |
Create the .mgsv file from the SideOp Build folder that SOC creates, and then install it. Run the game and go to your custom side op to see the fruits of your labor! |
Create the .mgsv file from the SideOp Build folder that SOC creates, and then install it. Run the game and go to your custom side op to see the fruits of your labor! |
||
| − | [[File:Game.png|thumb|832x832px]] |
+ | [[File:Game.png|thumb|832x832px|none]] |
Revision as of 01:49, 24 April 2020
This covers the very basics of using the Route Builder in Foxkit, allowing you to make a basic route that will make a soldier move between two set points repeatedly. It will not cover opening Foxkit in Unity, or using source control to access Foxkit. For both of those topics there are many other tutorials online. It will also not cover creating .mgsv files in Makebite, or installing them with Snakebite. So proceed under the assumption that you know how to do those things. In order to create routes you will need the following tools:
- Unity Version 2018.3.6f1
- Foxkit (Clone the source)
- Side Op Companion (Also install the Infinite Heaven Quick Menu preset that comes with this)
The first thing you want to do is launch the game and head to the location that you want to make a side op in. Once you are there hold down the call button and press Up on the keyboard to set all of the enemy soldiers to friendly. Next you will travel to the nearest outpost or area with enemy troops. Place a marker on one of them and hold the call button again. This time press Down and the screen will print the soldier's name, and the nearest CP. Take note of the CP name.

Once you have that information you can proceed to where you would like to place your route. Navigate to the exact point you would like your route to begin and face the direction you would like the soldier to be facing at the beginning of the route. Hold down the Call key and press the Crouch key. This will print the coordinates of you location and orientation to ih_log.txt. That file is located in a folder named "mod" that can be found in the main MGS_TPP folder. Repeat this step for the second point of your route. You can now exit MGSV.
Open up ih_log.txt in your text editor of choice. Scroll to the bottom to find some important pieces of information. The first is a line that contains the quest area you were in when you took your coordinates. Next to that it will say if it is an acceptable location to place a side op. Below that information are the coordinates that you took.

Keep this information open, as you will need it for the remaining steps. Open up Foxkit in Unity, this may take a moment the first time you open it. Right click in the hierarchy area. In the menu that appears select Foxkit -> Route Set.

This will create a new game object, as well as open an area where you can begin to edit your new route. Click the button to create a new route within your route set. This will create a child object that contains the route, and the first node for the route nested within it.

Click on the first node. With the first node open you are able to edit the coordinates of it under the Local Transform option. Paste in the first set of coordinates that you took here. IMPORTANT - The X coordinate should always have the opposite positive or negative value as the coordinate that you took. So if your taken X coordinate is 100, then you would enter -100 in Unity. If your taken coordinate is -100, then you would enter 100 in Unity.

Once the first value is set, click on the button to create a new node.

With the new node created and selected, enter the values for the second set of coordinates that you took. Remember to flip the positive or negative on the X coordinate.

Once both coordinates are placed, click on the Parent Route set object in the Hierarchy, and then click on the button to save your route to a .frt file. Save it to the Route Assets folder in the SOC Assets folder that gets installed with SOC.

Open up SOC to create a new sideop. Enter in a file name for it, an unique Quest Number for it, set the location to the map the route is meant for, place coordinates for the general area that the route is in and then choose the correct Quest Area (found in ih_log.txt), the correct Quest CP (this was found from the tagged soldier in game) and then select your route file. Fill Radius, Quest Category, and Rank to whatever you wish.

Fill out the Flavor text fields and then press the button to proceed to the next part of SOC.

Spawn a sol_quest enemy, assign him to your custom route and then press the button to build your side op.

Create the .mgsv file from the SideOp Build folder that SOC creates, and then install it. Run the game and go to your custom side op to see the fruits of your labor!
